I would like to think that I am asked by friends to aid with computer and gadget issues because they see me as competent with technology. The reality is probably closer to what my wife would say…I’m a nerd. She’s right of course. I’m a card-carrying member of that tribe and proud of it. Pulling together all my geek nerd talent I offer a short tutorial on the four easy steps to set up a ‘Gmail’ email account.
How did this tutorial come about? Well, I was asked the other day to explain to someone why they should use Twitter and then, as a follow on, how to set up a twitter account. I started writing on that and realized that email is a basic first step to setting up a Twitter account and I parked my basic Twitter tutorial post and instead have done this one, setting up a Gmail account. It’s basic stuff to be sure. But you know, we so often look at the world from our context and think everyone knows how to do things that we may think are basic. Well, that is often not the case. What is basic to some is really confounding to others. So, this simple four step tutorial is for anyone, including my mom, who has never set up an email account.
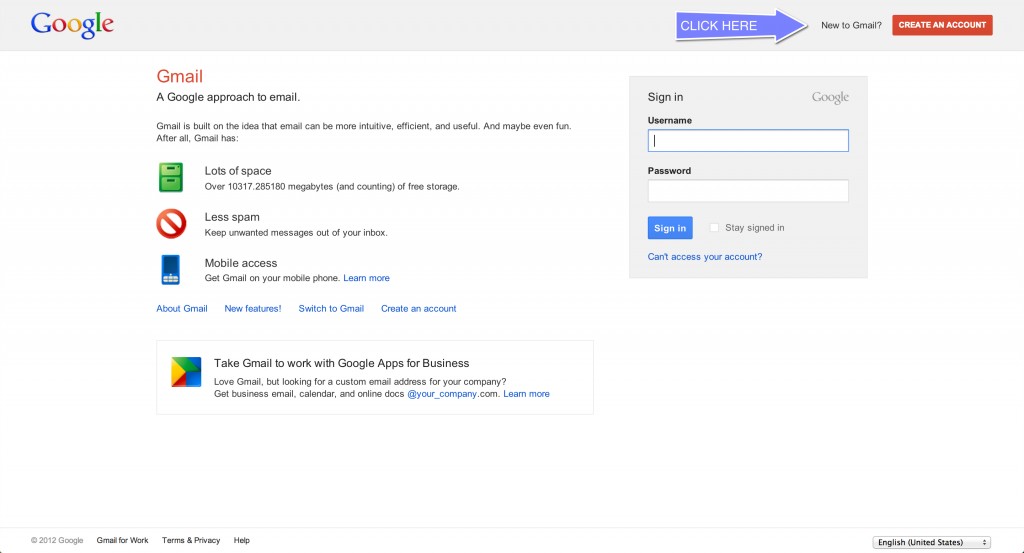
Step 1: In a browser search bar type in www.gmail.com (or click the link). The screen you will see is shown below. If you are following this you are wanting to set up a new Gmail account so click on the CREATE AND ACCOUNT button.
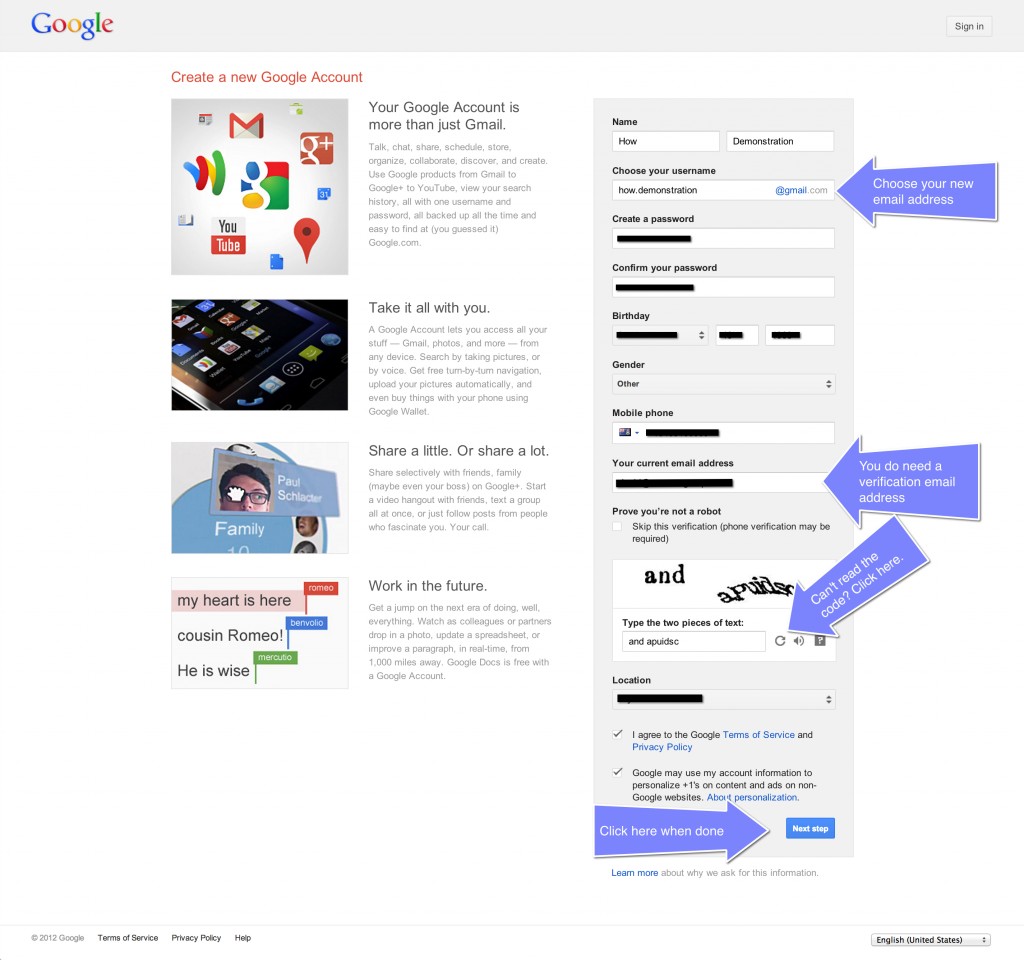
Step 2: This is where you will enter your first and last name, desired email address, password, and, optionally, some contact information.
- Most people will enter their real name for the account name. It is entirely up to you. You can see this one here I set up as first name ‘HOW’ and last name ‘DEMONSTRATION’.
- Your email can be one word, or two. If two most people will decide to put a ‘.’ between the first and second name (or words) of an email address. You don’t have to enter anything else. The ‘@ gmail.com’ will be automatically added at the end. If your desired email address is not available Gmail will suggest three alternatives. Choose one of those, or if you don’t like them just enter in another choice and try again.
- Your password is the last piece of the puzzle. You will want it to be strong and something you can remember. Gmail helps in giving you a colour coded indicator of password strength. You will have to enter the password you have chosen twice to make sure you did not make a typo that will prevent you access to the account once it is set up.
- Optionally you can enter your cell phone number or another email address for verification texts of emails if, for instance, you forget a password and need it reset. Of course if you are setting up your first email you don’t have an email address to enter here. Suggestion…contact a close family member and ask them if you can put their email in this field if you want one there.
- The next step on this screen is the CAPTCHA code entry to make sure you are a real person, not a bot. If you can’t read the random code (and I often can’t) then click the recycle button and a new code will be generated.
- Finally, click the check box to agree to Google’s terms for using Gmail, then click the NEXT STEP button.
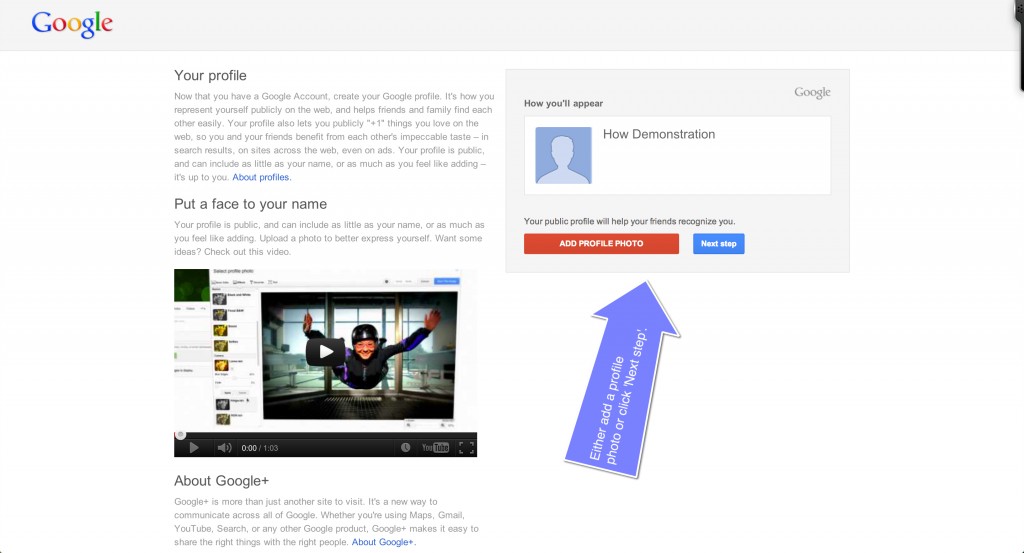
Step 3: You have two options here.
- Add information to enhance your profile, the key item being a photograph.
- Skip the addition of information (you can always do it later from your account settings).
I did not set up a photo for this address and simply clicked on the NEXT STEP button.
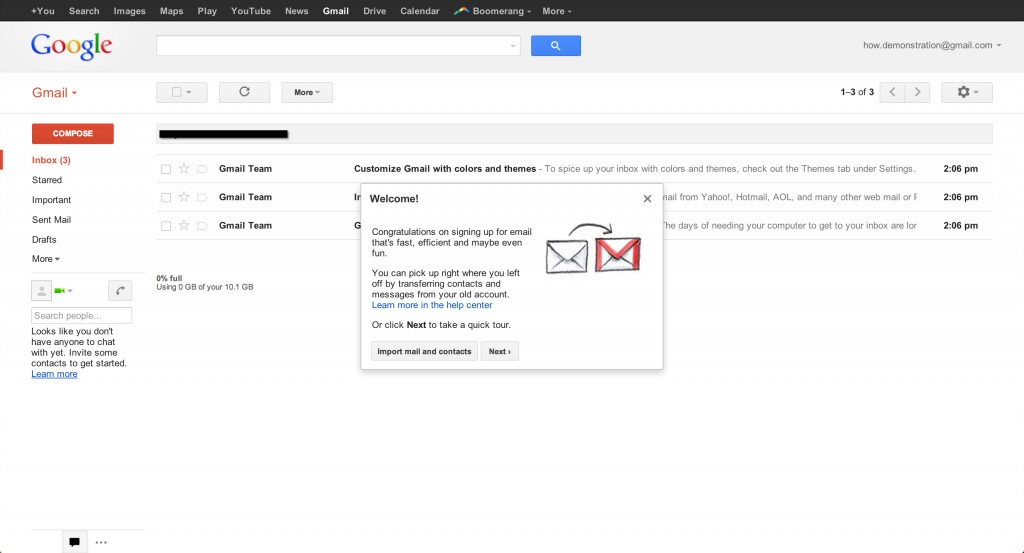
Step 4: That is it. Really. It’s as simple as that. You now have a Gmail account. Its free and comes with 10 Gigabytes of storage (that’s over 10,000 typically sized emails). You also have free access to Google Calendar, Google Drive (like Dropbox), and so many more integrated features.
Hopefully this short tutorial is of help. Its my first attempt at one and while a basic subject, it provided me the opportunity to learn how to write a tutorial. I also learned how to use the screen capture programme Snagit. This simple capture tool is fast becoming a favourite of mine for annotating screen shots and was the perfect way to describe these steps visually. Try it yourself. Its available for both Mac or Windows operating systems.
I’m working on the simple Twitter tutorial for a later post. Let me know other web applications or programmes that you would like me to cover in the future and as always I welcome your comments.


